
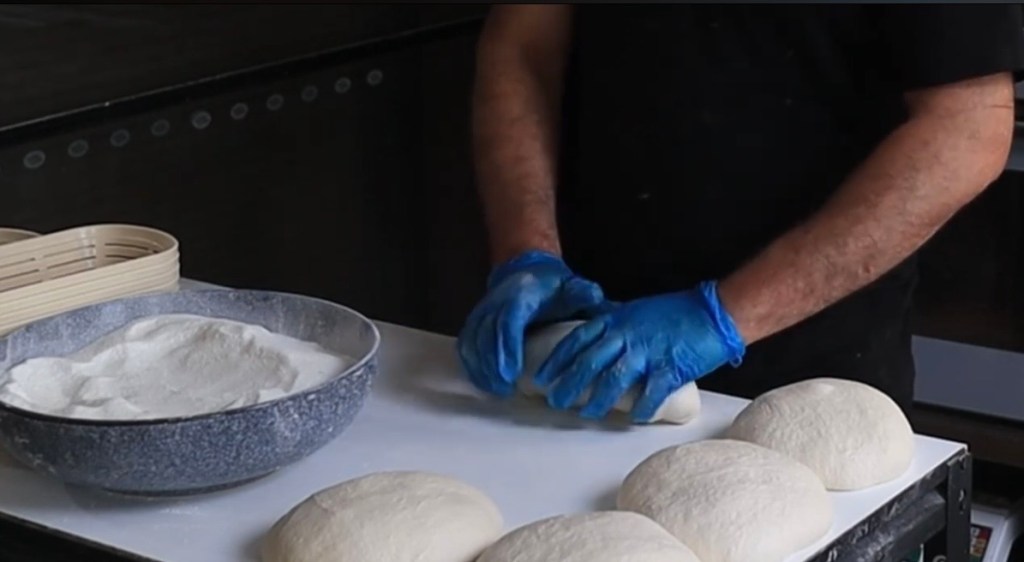
The first time you try to shape a sourdough loaf, it can feel as though the dough has a mind of its own. It sticks to your hands, spreads across the bench, or refuses to become that neat, confident shape you see an experienced baker make.
Here is something I want every beginner to understand: shaping is hard at the beginning. That does not mean you are doing it wrong. It means you are learning.
After years of working with bread, I can tell you that the most valuable shaping skill is not a particular trick or fancy movement. It is something bakers develop over time: “baker’s hands.”
At the beginning, simply do your best
When you are new to sourdough, my advice is simple: try your best to roll and shape the bread with the handling skills you have today. You don’t need to make it perfect. You need to practise.
Gather the dough, give it some structure, and try to create a little tension on the outside. Work with what the dough allows you to do. If it feels awkward, that’s all right. If it doesn’t look as beautiful as the loaf in the video, that’s all right too.
What matters is that you keep handling dough and paying attention to the way it responds. Each time you shape a loaf, you are teaching your hands something new.
Watch my sourdough shaping method, step by step
In this video, “SHAPING SOURDOUGH | THE MOST EFFECTIVE WAY,” I demonstrate my approach in depth so you can see the movements and how I handle the dough. Watch it as a guide, then return to your bench and practise.
If the video does not load, watch my full sourdough shaping tutorial on YouTube →
What I mean by “baker’s hands”
Baker’s hands are not something you are born with. They come from repetition. Over time, your fingers learn to recognise the difference between dough that is relaxed and dough that is resisting, dough that can take a little more tension and dough that needs you to stop.
You begin to notice the small details that are almost impossible to understand just by reading a recipe:
- How the dough feels when it has strength and elasticity.
- When the surface is becoming smooth and supported, rather than stretched too far.
- How much pressure to use without squeezing out all the gas or tearing the dough.
- How to adapt when the dough is softer, stickier, warmer, or further along in fermentation.
Eventually, the movements begin to feel natural. You stop thinking about every finger position and start understanding what the dough needs. That is the real meaning of developing baker’s hands.
Good shaping isn’t about forcing a tight loaf
There is a difference between creating surface tension and fighting the dough. The goal is to give your loaf enough structure to hold its shape during proofing and baking, without tearing the skin or handling it more than necessary.
Different doughs will feel different. Flour strength, hydration, fermentation and temperature all affect how the dough behaves. A soft, well-fermented dough will not respond exactly like a firm, less hydrated one. A shaping method is a guide, but your hands have to respond to the dough in front of you.
And remember: shaping cannot magically correct every problem from mixing or fermentation. If a loaf continually spreads or tears, the answer may not be to shape harder. It may be worth reviewing the dough’s development, fermentation or hydration.
A simple way to get better every time you bake
- Stick with one shape for a while. Practise a round loaf or an oval loaf repeatedly before trying every possible technique.
- Use gentle, deliberate movements. Aim for structure and a smooth surface, not maximum tightness at any cost.
- Notice what happens. Does the dough resist, relax, stretch or tear? Those reactions are feedback.
- Compare your results. Look at how the shaped loaf holds during final proof and how it bakes. Learn from that result.
- Repeat. One shaping session teaches you something; many shaping sessions build confidence.
Your hands will learn what your eyes cannot yet see
One day, you will shape a loaf and realise you did not have to think so hard about it. You will know when to roll, when to tuck, how much tension to build and when to leave the dough alone.
That confidence does not arrive because you finally discovered the perfect video. It arrives because you watched, tried, made mistakes, paid attention and tried again.
So if you are struggling to shape sourdough today, keep going. Do the best you can with the dough in front of you. The more often you practise, the better you will become—and your baker’s hands will follow.
Watch SHAPING SOURDOUGH | THE MOST EFFECTIVE WAY, then tell me in the comments: what part of shaping feels hardest for you right now?
For more practical sourdough advice, browse the Baking Journal. And if you want to experiment with hydration and flour blends before your next bake, try my free Sourdough Precision recipe calculator.


Leave a Reply